- Home
- Works & Tech
- We Tried Making a Walkthrough Movie in Unreal Engine
We Tried Making a Walkthrough Movie in Unreal Engine
WAN creates a wide range of content, such as videos of buildings and spaces and VR, using Unreal Engine, and in this blog post we introduce Unreal Engine, developed by Epic Games. It was originally developed for the game "Unreal," released in 1998, but has since come to be widely used by many game developers, filmmakers, architectural designers, and others. For those who have never used Unreal Engine, we will explain how to install it and the basic steps for creating a walkthrough.
How to install
1. Download the Epic Games Launcher
First, to install Unreal Engine, you need the Epic Games Launcher.
- Go to the official website: Visit the official Unreal Engine website.
- Download the Epic Games Launcher: Click the "Download" button in the upper right of the screen and download the Epic Games Launcher.
2. Install the Epic Games Launcher
Run the downloaded installer to install the Epic Games Launcher.
- Double-click the downloaded file to run it.
- Follow the installer's instructions to complete the installation.
3. Set up the Epic Games Launcher
Once installation is complete, start the Epic Games Launcher.
- When you start the launcher, you will be asked to log in with an Epic Games account. If you don't have an account, you can sign up for free.
- After logging in, select "Unreal Engine" from the menu on the left side of the launcher.
4. Install Unreal Engine
Install Unreal Engine from within the Epic Games Launcher.
- Go to the "Unreal Engine" tab and click the "Library" tab at the top.
- Click the "Install Engine" button in the upper right of the screen.
- Select the version to install. We generally recommend choosing the latest version.
- Specify the installation location and click the "Install" button.
5. Launch Unreal Engine
Once installation is complete, launch Unreal Engine.
- In the "Library" tab of the Epic Games Launcher, check the version of Unreal Engine you installed.
- Click the "Launch" button for that version.
- On first launch, additional required components may be installed.
How to create a walkthrough movie
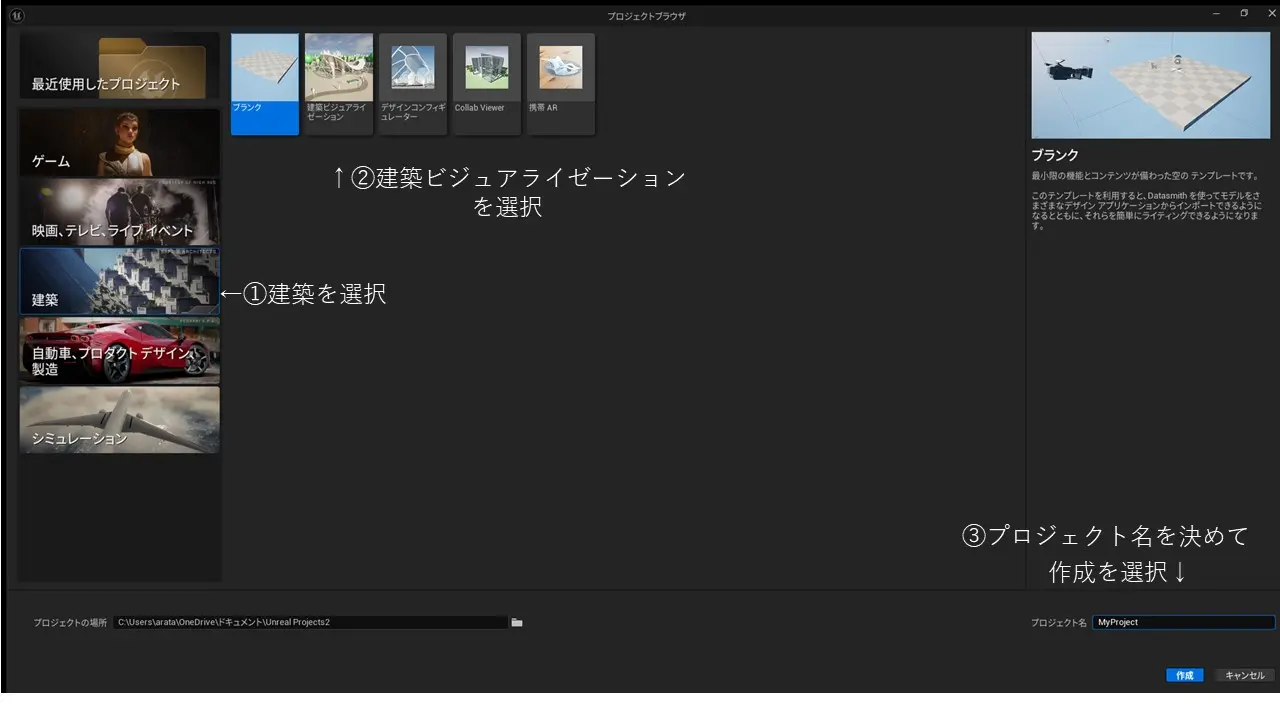
1. Creating a new project and choosing a template
This time, we will create a movie using a project that comes with UE5. First, after launching UE5, create a new project.
① Select Architecture
② Select Architectural Visualization
③ Enter a project name and select Create to start the project
2. Adding a Level Sequence
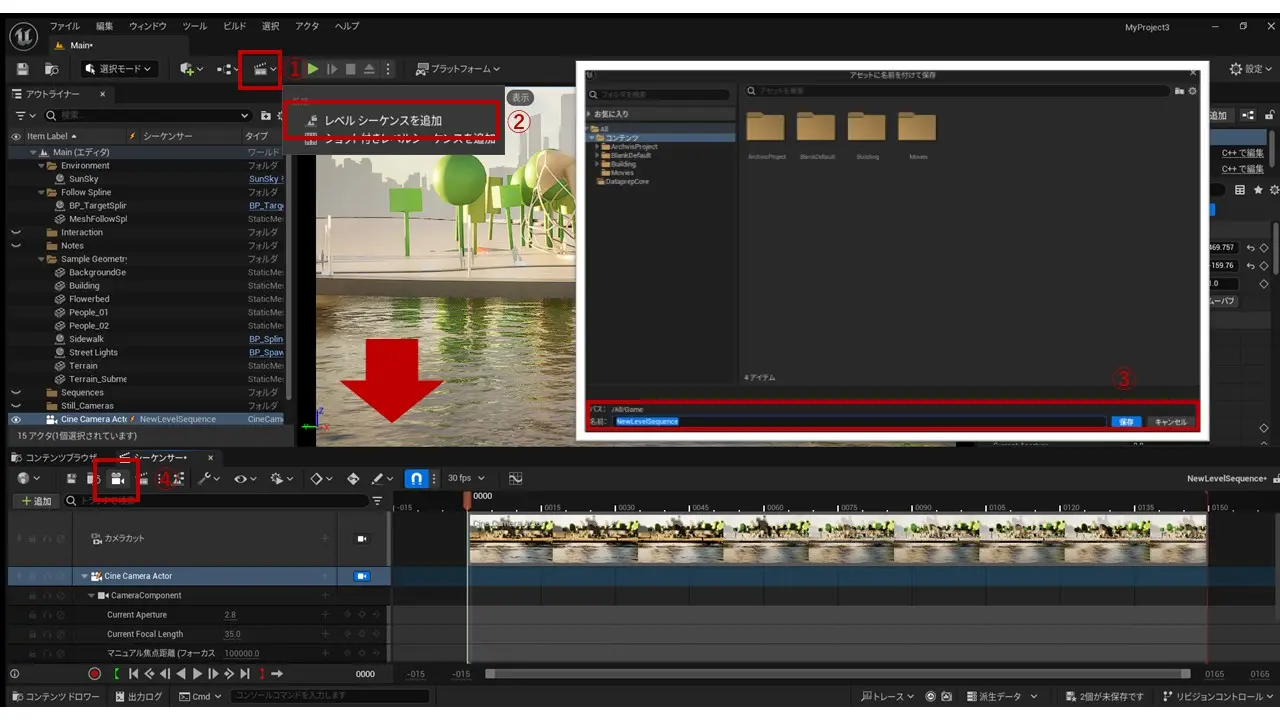
① Select the movie icon
② "Add Level Sequence" appears below; select it
③ When you add it, the "Save Asset As" dialog appears; enter a name and select Save
④ Select the camera icon
The Sequencer will then appear at the bottom of the screen.
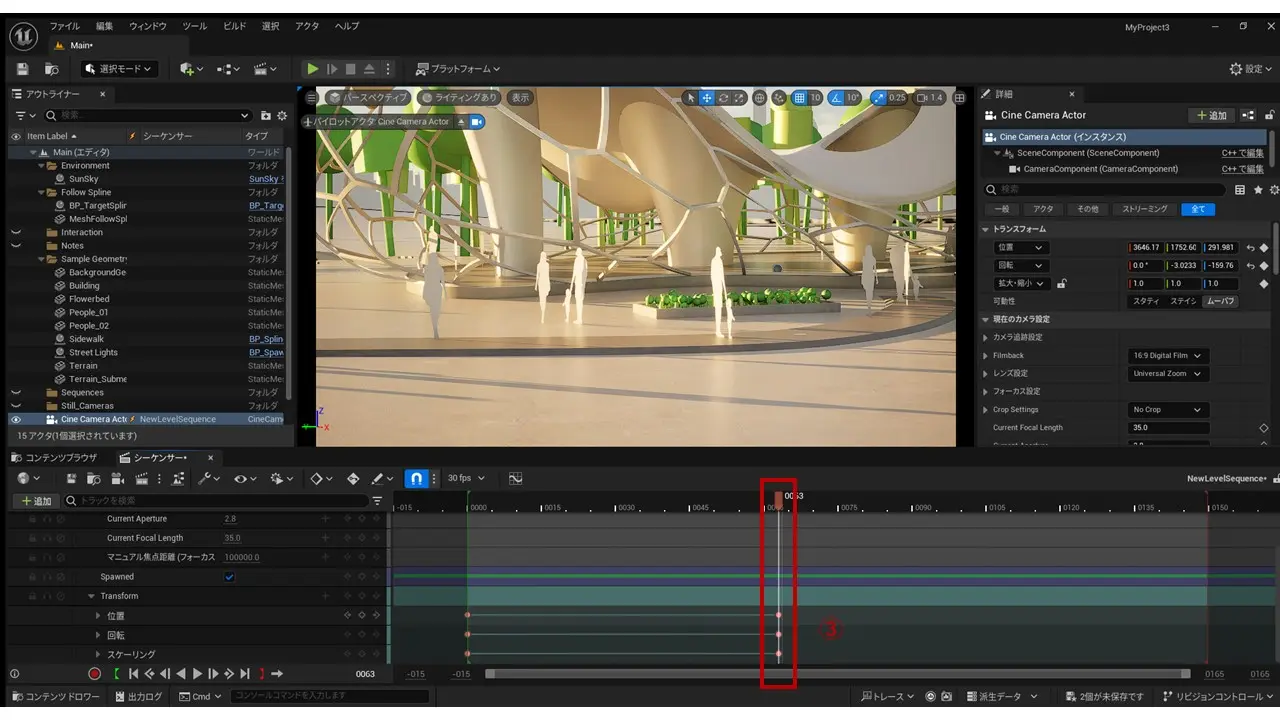
3. Setting keys with keyframes
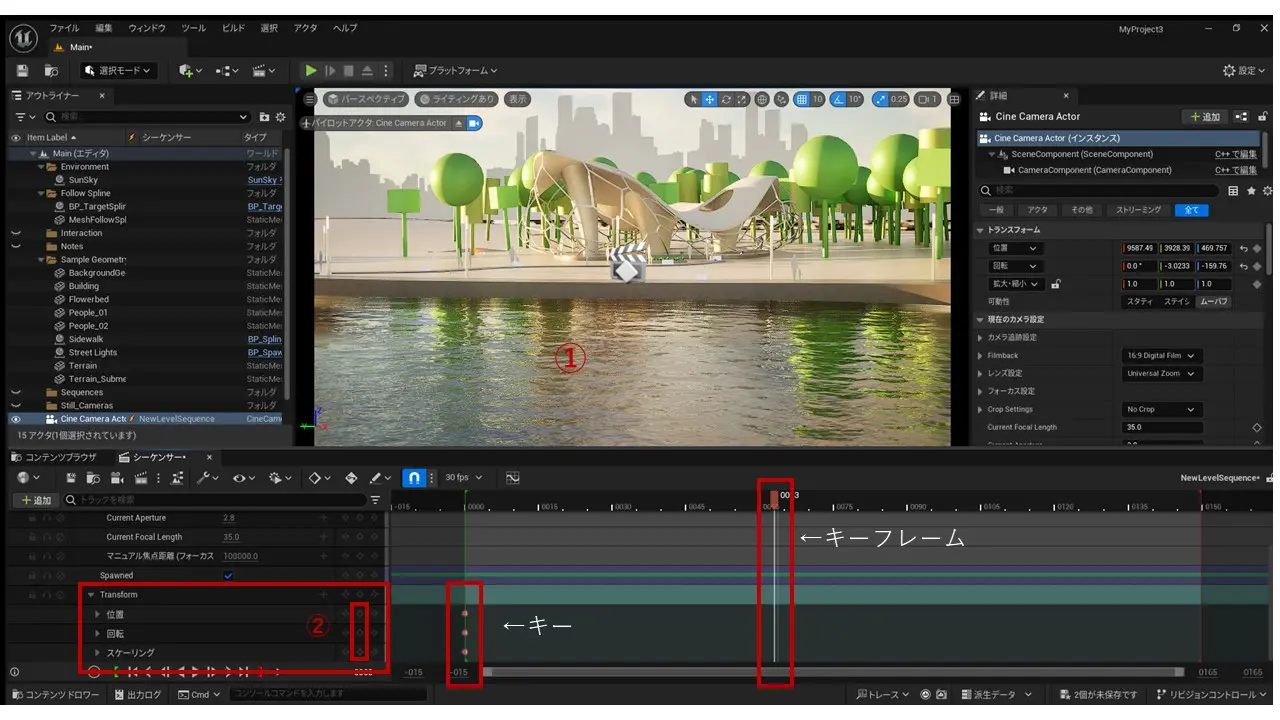
① Move the camera in the viewport to decide the starting point of the movie.
② Move the keyframe position and press the + button for Transform (Location, Rotation, Scale) to set a key (point) at that position.
③ Move the camera in the viewport, decide where to set the next key, and set it.
That concludes this explanation.
Finally, after adjusting various settings and rendering it out, the movie turned out like this.
If you've read this article, please give it a try.

I've only just started learning Unreal Engine myself, so I'm not really in a position to give advice, but I plan to keep posting useful content on the blog, so I'd be glad if you keep an eye on it.
Movie production using Unreal Engine
WAN creates walkthrough movies using Unreal Engine, mainly for condominiums. Our work is posted on YouTube, so please check it out if you're interested.